I don't know about you, but I have never been a conformist. This didn't go over too well in high school -or the police academy either for that matter-but it serves me well now. As individuals, we each have ways that we like to do things-they work for us, but might not work for someone else. Some things are universal though, and I think that most people like to customize their work space to suit the way they work. Many people also like to add a dash of personality to their cubicle as well. Since I spend so much time at my computer, I like to regularly change the way my screen looks. In winter, it may feature a picture of the beach. In summer, tropical fish may swim across my screen. Unfortunately, my desktop is often not visible because I am deep in some program or other. I have mentioned previously that my office uses CryWolf to process our alarms. When our rep shared that the main CryWolf screen could be customized, I was immediately on board. It is very simple, so follow these directions to "have it your way" as the Burger King commercials used to say.
To change the way the main screen appears, right click on the menu bar (where all the icons are) at the top of the CryWolf screen. The Screen Setting Options box will open.
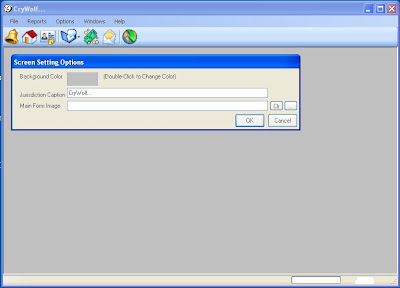
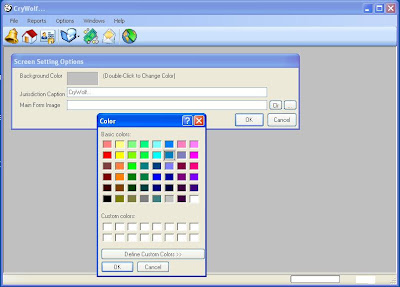
To change the background color of the main screen, double click on the Background Color box. A pop up box will appear and the color choice may be selected. Once the color is chosen, click Ok.
You can also customize the caption at the top of the screen to say whatever you like. Type your selection in the Jurisdiction caption box where it says "Your Name Here CryWolf" in the photo below.

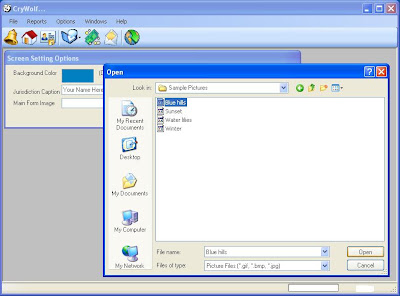
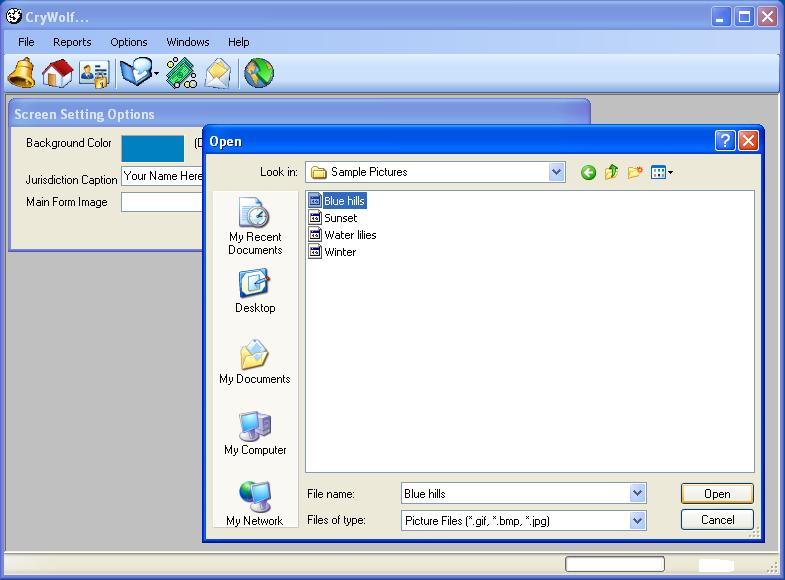
My favorite bit of customization is that you can add a picture to the main screen as well. Simply click on the little box with 3 dots at the end of the Main Form Image line. A pop up box will open and allow you to choose an image from your image folders. Select your image and click Open.
If you have finished customizing, click Ok and the changes will appear on your main screen.

Keep in mind that the size of the picture file will determine how much of the screen is covered. In our sample, the background color doesn't appear unless the screen is maximized. Smaller pictures will appear in the center of the screen and be surrounded by the background color.
As a reminder, these tips are specifically for the .net version of CryWolf. I can't say if they will work in the classic version or not.
Enjoy your new view!
To change the way the main screen appears, right click on the menu bar (where all the icons are) at the top of the CryWolf screen. The Screen Setting Options box will open.

To change the background color of the main screen, double click on the Background Color box. A pop up box will appear and the color choice may be selected. Once the color is chosen, click Ok.

You can also customize the caption at the top of the screen to say whatever you like. Type your selection in the Jurisdiction caption box where it says "Your Name Here CryWolf" in the photo below.

My favorite bit of customization is that you can add a picture to the main screen as well. Simply click on the little box with 3 dots at the end of the Main Form Image line. A pop up box will open and allow you to choose an image from your image folders. Select your image and click Open.
If you have finished customizing, click Ok and the changes will appear on your main screen.

Keep in mind that the size of the picture file will determine how much of the screen is covered. In our sample, the background color doesn't appear unless the screen is maximized. Smaller pictures will appear in the center of the screen and be surrounded by the background color.
As a reminder, these tips are specifically for the .net version of CryWolf. I can't say if they will work in the classic version or not.
Enjoy your new view!
Comments
Post a Comment
Thanks for stopping by my little piece of the web. I look forward to reading what you have to say!